


How to install Arta clic flooring?
Preparation of conditions before installation
Laminate Flooring installation is one of the last stages of construction works. After drying and complete loss of moisture, the installation operation is carried out.
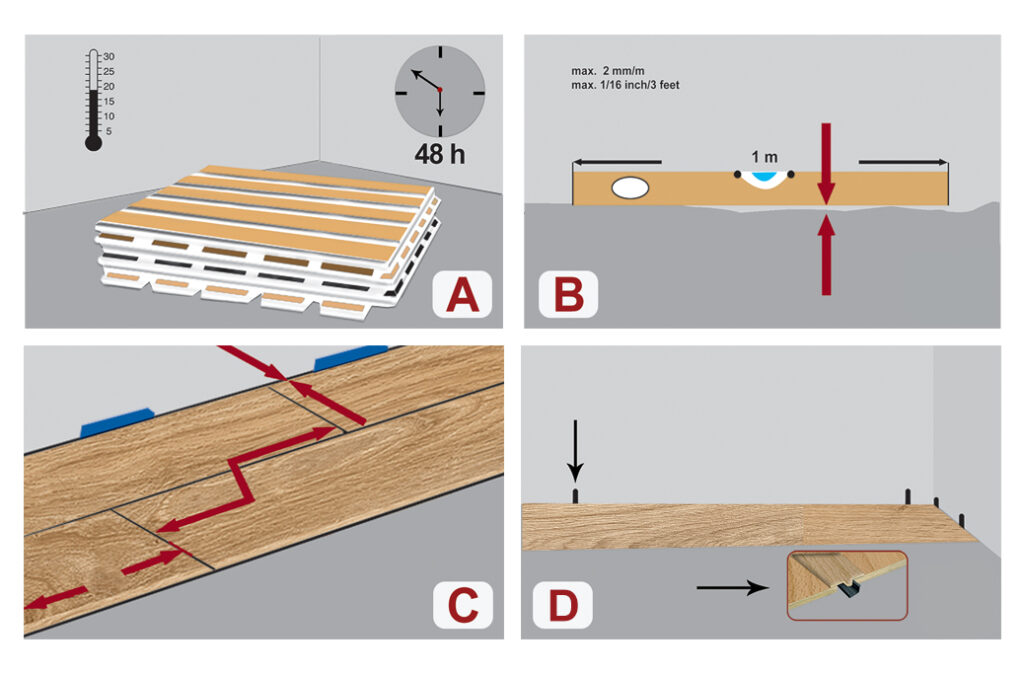
It is a necessary and basic condition that at least 60 days have passed since the floor construction date and that the floor is dry and approved by an expert and accurate moisture measurement tests are performed. The purchased parquet is placed in the middle of the room where it is installed in a crosswise manner (storage layout) without opening the coil for 48 hours so that they are at the same temperature as the environment. Parquet packages should be installed immediately after opening. Inspect all tiles carefully before installation.
Then mix the appropriate number of cartons (at least 3 cartons) and its tiles well. The temperature of the environment before installation, during installation and when using Laminate Flooring should be between 16 and 22 degrees Celsius and the humidity of the environment between 40 and 60%. These conditions must also be observed in the parquet warehouse. If the tile is problematic (caused by improper transportation and maintenance), do not install it. (Figure A)
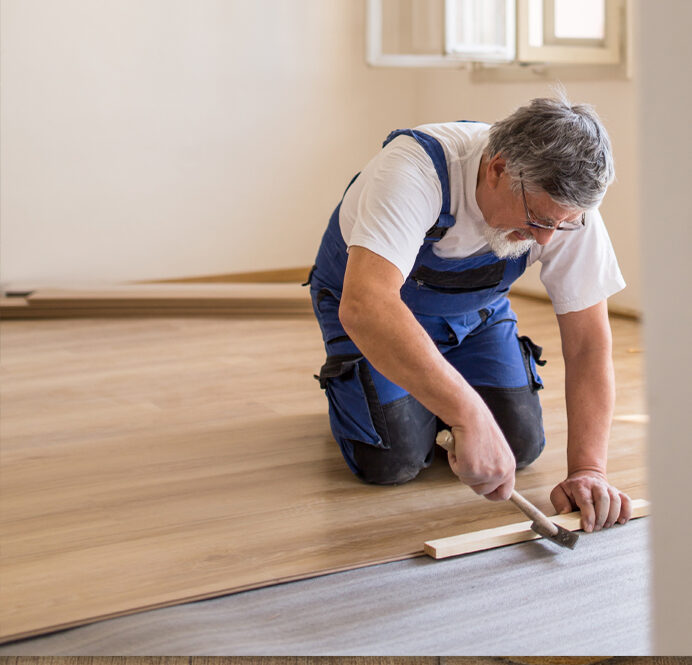
Laminate Flooring installation process
Materials and tools needed to install parquet:
- Hand saw or electric saw and carpet cutter
- Set square and tape measure
- Drill, wood glue and tension clamp at the end of the work
- Spacer to create an expansion gap
- Impact pad (to prevent direct impact to the edges)
- 51 mm wide adhesive tape for moisture insulation
- Mask and safety glasses
- Laminate Flooring
- Suitable foam with a thickness of 2 mm
- Nylon sheet with a thickness of 2 mm
- Silicone sealant
- cornice (to beautify the end of the work and cover empty expansion spaces)
Calculate the amount of necessary materials for parquet installation
At this stage, first calculate the total floor space required for laminate flooring installation. Get the number (width x length) based on the perimeter. Then add the area of the untidy parts to the room. At the end, add 10% to the obtained number and prepare the required amount of parquet, foam and nylon sheet based on the final number.
install steps
Step one: Remove any carpet or wood flooring attached to the concrete floor. Make sure that the desired floor is smooth, clean and dry. The maximum unevenness of the surface should not be more than 2 mm per meter. (Figure B)
Attention: Foam must be used to install parquet. If the installation is done on concrete or a concrete floor covered with mosaic, first, the moisture-proofing nylon must be spread under the foam, then the edges of the nylon must be placed at least 2 cm above each other and glued together with a wide waterproofing tape. (figure 1)
Note that the foam layers do not overlap and are placed butt to each other. For cement and concrete floors, compressed foam (Silent) is suitable, and for other floors, including ceramics and stone, ordinary foam is also suitable. (figure 2)
Step two: Measure the width of the room and divide it with the width of one tile. If the remainder is 6 cm or less, cut the first row of tiles from the male side to have the proper width in the last row.
The length of the first tile in a row should not be less than 40 cm, and the distance between the transverse seams of the tiles should be more than 40 cm. (Figure C)
Step three: Start from the left corner of the room and install the tiles in the direction of sunlight so that their longitudinal side is parallel to the longitudinal side of the room. (Figure D)
Attention: The best area for installing parquet is 10 meters long and 7 meters wide. If it is more than this size, T-shaped separators should be used and the floor area of the room should be divided into two parts. The size distance should be used to create an expansion space all around the room, between installed objects (pipes, door frames, cabinets, etc.) and parquet. (Figure E)
Step four: Clean the tiles of the first row and cut the male edge of the tiles, place the shortened edges parallel to the wall, taking into account the expansion space. (Figure 3)
Step five: Install the tiles one after the other by placing the male edge on the female edge and with an angle of 20-30 degrees and a little pressure. (Figure 4)
Step Six: When you reach the ends of the row, measure and cut the last tile to fit. According to the angle of the blades, the cutting side should be determined in such a way that it does not damage the surface of the decor. (Figure 5)
Attention: For the cutting operation, a place outside the house should be considered so that the cutting does not cause dust in the installation place, and glasses and masks must be used.
Step seven: Raise the previously installed row slightly so that you can tap the adjacent tile into position. (Figure 6) Next tiles are installed angle to angle. (Figure 7) Then put the tile completely in position with your hand (Figure 8) and push it down. (Blows should not damage or break the clicks) (Figure 9)
Step eight: To install the last row, mark the border of the wall and cut the tile. (Figure 10)
Note: Parquet must continue under the frame. Use a piece of scrap parquet to mark the depth of the door frame that needs to be cut. (Figure 11)
step nine: Remove the spacer, install the baseboards without nailing or attaching them to the floor, and cut any excess nylon sheeting from the top of the baseboards. Avoid gluing the parquet to the foam layer.
The process of installing parquet in certain places
Kitchen and moisture-sensitive environments:
It is not recommended to install parquet in wet environments In case of installation, the following points must be observed:
Do not install cabinets on parquet. Parquet should be installed up to the front of the cabinets and at a distance of 8 to 10 mm for expansion. Fill the expansion gap in all wet areas such as dishwashers and around sinks with silicone sealant. Always use a small amount of our silicone sealant between the bottom of the baseboards and the parquet surface.
Underfloor heating system:
• In places with floor heating system, special foams made of natural cork or silent foam with aluminum layer should be used.
• The place that has a floor heating system must be heated by this system before installing laminate flooring to completely eliminate the moisture and moisture in the floor.
• It is necessary that the temperature should be at the highest level for 72 hours and the temperature should not be reduced during this period. After 72 hours, gradually reduce the heat. The floor heating should be left on for at least three weeks to completely remove the moisture from the floor.
• Turn off the underfloor heating system two days before starting installation. The temperature of the floor before and during installation and 48 hours after it should be 16-22 degrees Celsius.
• Installation of laminate flooring is allowed only on the floor heating system with the method of heat transfer through water circulation, provided that this system is present in all parts of the room floor. Also, make sure that the heat produced by the underfloor heating system is the same throughout the room.
• The maximum temperature of the parquet floor while using the floor heating system should be 27 degrees Celsius and the temperature of the hot water should not be more than 60 degrees Celsius.
• 48 hours after installation, turn on the floor heating system and gradually increase its temperature. (5 degrees daily) This process is also true when the temperature drops.
Around the pipes:
To install laminate flooring around the pipes, use a drill to make a hole on the tile that is 16 to 20 mm larger than the diameter of the pipe. Cut the tile in the middle of the circle, place it on the floor, glue the pieces of tile together and hold them with clamps. (do not stick the parquet to the floor)
When the parquet installation is complete, cover the expansion gaps with caps. Seal around the water pipes with silicone sealant. (Figure 12)
Note: To replace a tile that may be damaged, lift the last installed tile by 3 cm until it opens. (Do not open and close more than 3 times) Continue opening the tiles until you reach the damaged tile, replace it and reinstall the tiles.
Related posts

Building renovation or renovation+ home renovation cost checklist
Renovating and renovating the house can be an exciting and interesting experience, but at the same time, it can also become an exhausting process and...
Read MoreHow to clean laminate parquet?
Today, laminate flooring has found a special place among users as one of the most convenient and practical elements in interior design.
Read More